
How to Set Up a Tracking Pixel
for Instagram Ads
If you’re running ads on Instagram and you’re not using a tracking pixel, you’re essentially flying blind. A tracking pixel closes that gap, telling you what happens after someone clicks your ad and feeding that data back to optimize your campaigns.
This guide walks through everything you need to know to deploy your tracking infrastructure — what it is, why it matters, step-by-step setup, and critical mistakes to avoid. 🚀✨
What Is a Tracking Pixel, Exactly?
Since social ads are managed through Meta’s ecosystem, the tracking pixel is the shared engine powering both Facebook and Instagram campaigns: a small snippet of JavaScript code tracking post-click behavior.
What the Pixel Captures
Conversions API (CAPI)
Introduced to combat ad blockers and browser cookie restrictions, CAPI sends conversion data directly from your server rather than relying solely on browser tracking.
Bypassing Blind Spots
Without pixel and server-side tracking infrastructure, Meta’s algorithm flies blind, unable to optimize delivery toward high-value buyers and actual conversions.
The Modern Standard
Meta increasingly recommends running both the Pixel and CAPI together. The pixel remains the client-side foundation, while CAPI serves as its resilient server-side companion.
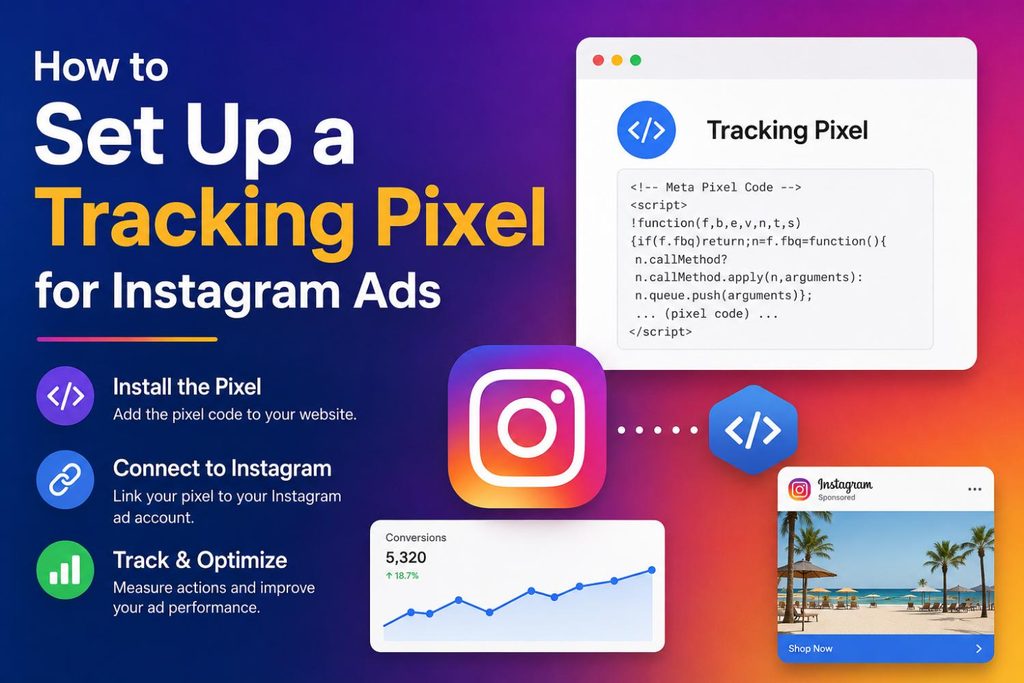
What an Instagram Ads Pixel Code Looks Like
The Meta base tracking pixel is a lightweight JavaScript snippet placed in the <head> of your website, establishing the core data stream connecting your storefront to Instagram ads.
<script>
  !function(f,b,e,v,n,t,s)
  {if(f.fbq)return;n=f.fbq=function(){n.callMethod?
  n.callMethod.apply(n,arguments):n.queue.push(arguments)};
  if(!f._fbq)f._fbq=n;n.push=n;n.loaded=!0;n.version='2.0';
  n.queue=[];t=b.createElement(e);t.async=!0;
  t.src=v;s=b.getElementsByTagName(e)[0];
  s.parentNode.insertBefore(t,s)}(window, document,'script',
  'https://connect.facebook.net/en_US/fbevents.js');

  fbq('init', 'YOUR_PIXEL_ID');
  fbq('track', 'PageView');
</script>
The Asynchronous Handshake
That JavaScript script initializes asynchronously across every page view, securely transmitting browser session data back to Meta’s machine learning engine without slowing down your site speed.
Powering Downstream Optimization
It doesn’t alter web layouts or block visitor navigation — it silently collects core behavioral metrics to optimize your Instagram ad delivery toward real conversions and high-value buyers.
Why the Pixel Matters for Instagram Ads Specifically
A lot of advertisers assume tracking is a “nice to have.” In reality, it’s the backbone of effective social advertising for a few concrete reasons.
It Powers Optimization
When you choose objectives like “Conversions” or “Sales,” the algorithm needs data to know who to show ads to. Without pixel data, Meta cannot optimize delivery for actions.
It Enables Retargeting
The pixel lets you build custom audiences of people who visited your site but didn’t convert, serving high-ROI follow-up ads to users who have already shown intent.
It Enables Lookalike Audiences
Once the pixel collects enough data on your converters, you can ask Meta to find new users who resemble them, scaling campaigns profitably beyond your initial audience.
It Gives You Real Attribution
Without a pixel, you’re left guessing whether ads drive revenue or just vanity metrics like likes and comments, connecting ad spend directly to business outcomes.
Before You Start: What You’ll Need
Before launching your social advertising campaigns, ensuring you have the proper administrative access and infrastructure in place prevents costly setup delays.
Meta Business Manager
Access to a Meta Business Manager account (formerly Business Suite) to centralize your asset management and permissions securely.
Ads Manager Access
Admin or advertiser access to the specific Ads Manager account you’ll be using to structure, launch, and monitor your campaigns.
Website & Tag Manager
Backend access or tag manager capabilities (HTML editing, Google Tag Manager, Shopify, WordPress, Wix) required for pixel and tracking code deployment.
Connected Instagram Profile
Your professional Instagram account successfully linked and connected to your Meta Business Manager profile for native ad placement.
Step-by-Step: Setting Up the Meta Pixel for Instagram Ads
Follow this structured technical blueprint to deploy tracking, set up standard events, configure Conversions API, and leverage your pixel data for high-performance campaigns.
Go to Events Manager
Log into Meta Business Manager (business.facebook.com) and navigate to Events Manager. Click “Connect Data Sources” to establish your central tracking hub for both Pixel and Conversions API.
Choose “Web” as Your Data Source
Select Web when prompted for your data source type. Since your social ads drive traffic to websites, landing pages, or online stores, this ensures proper web browser event tracking.
Name and Create Your Pixel
Assign a recognizable name tied to your business (e.g., MainSite_Pixel) and enter your website URL. Meta uses this to automatically detect platform frameworks like Shopify, WordPress, or Wix.
Install the Pixel Code
Deploy via manual header script injection, recommended partner integrations (Shopify, WooCommerce, Wix), or Google Tag Manager (GTM) to wire tracking directly into your site’s infrastructure.
Verify the Pixel Is Working
Install the Meta Pixel Helper browser extension to validate that events fire cleanly without errors or double-firing, and confirm PageView signals register inside Events Manager.
Set Up Standard Events
Track critical user interactions like ViewContent, AddToCart, InitiateCheckout, and Purchase using the visual Event Setup Tool or manual code snippets to optimize for actual revenue.
Set Up Conversions API (CAPI)
Bypass ad blockers and iOS privacy restrictions by implementing CAPI server-to-server tracking alongside your pixel, with Meta automatically deduplicating incoming events.
Use the Pixel in Your Campaigns
Power your social ads by setting optimization goals around conversion events, building high-intent custom retargeting audiences, and scaling profitably with custom Lookalike segments.
Common Mistakes to Avoid
Prevent tracking failures, data corruption, and wasted ad spend by steering clear of these five critical pitfalls during your Meta Pixel implementation.
Installing the pixel on only some pages
The base pixel code needs to be on every page of your site, not just the homepage or landing page. If it’s missing from your checkout or confirmation pages, you’ll lose visibility into your most important events.
Not passing purchase value
If your Purchase event fires but doesn’t include the order value, Meta can optimize for conversion volume but not for revenue — which usually leads to worse-quality results over time, especially if your product prices vary widely.
Firing events twice
This commonly happens when a pixel is installed both manually in the site code and through a platform integration or Tag Manager at the same time. Duplicate firing inflates your numbers and can confuse Meta’s optimization. Always check with Pixel Helper after any setup change.
Skipping verification
It’s tempting to install the pixel and move on, but skipping the verification step means you might run an entire campaign on broken tracking without realizing it until you’re wondering why performance looks off.
Ignoring domain verification
Since Apple’s privacy changes, Meta requires advertisers to verify domain ownership in Business Manager (under Brand Safety > Domains) in order to configure and prioritize conversion events properly, especially for iOS traffic. This is a separate step from pixel installation but is worth doing at the same time.
Final Thoughts
Setting up a tracking pixel isn’t the most exciting part of running Instagram ads, but it’s arguably the most important. Everything downstream — audience building, budget optimization, understanding which creative actually drives revenue — depends on having clean, complete data flowing back from your website. The good news is that for most businesses on common platforms, the base setup takes less than an hour, and the payoff in campaign performance and clarity is significant.
If you’re just getting started, prioritize getting the base pixel installed and verified first, layer in standard events for your key actions (especially Purchase or Lead), and treat the Conversions API as the next step once the fundamentals are solid. From there, you’ll have the data foundation you need to actually optimize your Instagram advertising rather than guessing at what’s working.
Frequently Asked Questions
Everything you need to know about setting up, verifying, and optimizing your Meta Pixel and Conversions API for high-performance Instagram ad campaigns.
The Meta Pixel tracks website user actions via web browsers using cookies, which can be affected by ad blockers and iOS privacy settings. The Conversions API (CAPI) shares server-to-server data directly from your hosting platform to Meta, ensuring reliable event tracking and bypassing client-side restrictions.
Yes. Implementing both creates a hybrid tracking setup. Meta automatically deduplicates incoming events from both browser and server sources, maximizing data accuracy and improving optimization efficiency for your ads.
The base code must be pasted into the header section (right before the closing </head> tag) of every single page on your website to ensure consistent session and pageview tracking.
Install the official Meta Pixel Helper browser extension for Google Chrome. Visit your website, click the extension icon, and verify that your pixel is detected without errors or duplicate tracking triggers.
Standard events are predefined code snippets (such as ViewContent, AddToCart, and Purchase) that track specific high-value user behaviors. They allow you to optimize ad campaigns for real revenue rather than just raw traffic.
Domain verification proves ownership of your web properties to Meta. It is mandatory under Apple’s App Tracking Transparency framework to configure and prioritize your top 8 conversion events for iOS traffic.
Yes. Google Tag Manager is an excellent deployment method that lets you manage both your Meta base code and standard events cleanly without hardcoding scripts directly into your content management system.
Duplicate events happen when a pixel is installed twice—such as through a native platform integration (like Shopify) and manually in the theme header or Google Tag Manager. Audit your setup and remove redundant installations.
Initial test activity usually registers within minutes. However, broader reporting metrics, aggregated audience insights, and custom event verifications can take anywhere from 2 to 24 hours to fully populate.
Ensure your Purchase event code includes dynamic parameter objects for value and currency. Without these parameters, Meta optimizes for transaction volume rather than actual revenue return.
While technically possible, it is strongly recommended to use a dedicated pixel for each distinct brand or domain. Mixing traffic pools muddies algorithmic optimization and complicates audience retargeting segments.
The pixel collects user visit history, allowing you to build retargeting lists of past website visitors, cart abandoners, or past purchasers over custom time windows (e.g., last 30 days) to run targeted Instagram ads.
Meta’s Aggregated Event Measurement limits domains to 8 prioritized conversion events for users who opt out of tracking. Proper configuration ensures your most critical conversion goals continue reporting correctly.
Lookalike audiences analyze your pixel’s source data (such as high-value purchasers) to find new Instagram users across your target country who share similar demographic profiles, interests, and online behaviors.
If you are scaling ad spend, experiencing attribution gaps due to iOS updates, or struggling to turn raw pixel data into profitable campaign returns, expert agency infrastructure setup ensures robust, leak-proof tracking.